

Learning and Perfecting
the Serve
Welby Van Horn
The serve is the easiest stroke to learn but the hardest to perfect. That statement may come as a surprise. You may think that the serve is difficult to learn due to the challenge of coordinating the actions of the ball toss with the racket swing. But I believe that the basic serve is actually the easiest stroke to learn, for many reasons.
The serving motion is essentially the same as throwing a ball. In tennis, you just throw the racket, not the ball. In fact, a great way for beginners to start learning the serve is to first throw a ball, but to do this while imitating the service motion and balance.
On the serve, you can take your time, nobody is rushing you. You can set up in the proper starting position, checking to ensure that the positioning of the feet and racket and the starting weight distribution are all correct.
Through the correct toss of the ball, you have control over the point of contact. Unfortunately, many players, when they toss poorly, "chase" and swing at the errant toss. In other words, they swing to their toss, wherever the toss may be. Instead, they should toss to their swing.
The serve is the only stroke in tennis a player can begin and then stop (after a poor toss) before completing. It is true that having to frequently catch your toss can be a little bothersome if you are playing a game. Fortunately, if you follow my instructions on how to toss properly, you will not have to catch too many poor tosses.
The proper balance when learning the basic serve has many similarities to the proper balance for the forehand groundstroke.
You can practice the serve by yourself.
The Advanced Serve
For the above reasons, I believe the serve is the easiest stroke to learn. But I also believe it's the hardest stroke to perfect. The reason I believe this is that the mechanics of an advanced serve differ substantially from those of the basic serve, and those advanced mechanics are difficult to master. These advanced mechanics are primarily the use of the continental grip, and the bending of the knees followed by the upward thrust of the legs launching the body into the air as you swing up and into the ball.
For these reasons, the serve should be learned in a series of gradual progressions. It should be shaped gradually into a final championship service action like a sculpture is gradually molded from clay. In these articles, we'll go through that process step by step. Let's start by discussing some of the general issues, controversies, and misunderstandings in teaching the serve. Then in the future, we'll go over the building blocks of the motion and the checkpoints for the key positions for both the basic and advanced motions.
The Grip
Given how difficult it is for many players to get used to the advanced (continental) grip, some teachers think that students are better off "biting the bullet" and starting off with the advanced grip. They reason that while it is very frustrating in the beginning, the student will eventually learn to perfect it and will not become "stuck" using an inferior grip as he resists the transition to the advanced grip.
I beg to differ with that opinion. I believe that it is important to have success at each level of play and be able to play and to serve immediately. The fact is that many recreational players will never feel comfortable serving with the continental or composite grips.
The serve should be developed in stages, and this applies to the grips. Starting with a group that gives you immediate success will help you learn to enjoy the game when learning. It will also provide a base to progress to more advanced grips. In my experience, there are rarely problems progressing to the spin grips once the fundamentals on the motion are developed.
 |
 |
You can start with an eastern grip and move to the continental. |
|
You can start to learn with a semi-western grip, then move to the eastern forehand grip. Or if you have an eastern forehand grip you can start with that. Once you are comfortable, you then move to the composite grip, which is between the eastern and the continental, followed by the continental.
The composite or continental grips offer the only real way to generate spin. But spin alone does little good as the ball will just "sit up." You need ball speed penetration along with spin to have an effective spin serve. Sometimes you see players who have learned first with these advanced grips hit spin, but with very little velocity. I believe they are better off approaching it the other way round.
Some players stop at the composite grip, never progressing to the continental. Some players can achieve the proper combination of power and spin on the serve with the composite grip, and for them stopping at the composite grip works. However, for most players, the continental grip offers the best means to achieve the combination of spin and power.
The Backswing
There is a good deal of variation in the length of the backswing in the serves of the pros. Roger Federer has a classical backswing in which the racket head first drops down (with the racket tip pointing to the ground) and then circles towards the back fence before going up. In contrast, Andy Roddick has a very abbreviated backswing in which the racket goes upward from the starting position. Most pros have backswings somewhere in between.
While you can obviously have an excellent serve with any of these backswings, I prefer the classical action. The classical action, with its fuller backswing, provides more rhythm and is easier to learn. It seems to require less shoulder flexibility as well. To learn the classical backswing, practice the serve standing near the back fence so that the back of the racket frame slightly brushes the back fence.
Whether you use the classical full backswing or the abbreviated backswing, one point is critical on the backswing: the face of the racket should be slightly closed. As you are raising the racket up on the backswing, the palm of your hand should be turned somewhat towards the ground (this will "close" the face of the racket).
This closed position keeps your elbow away from the body and allows you to properly "throw" the racket at the ball. If you look at any baseball pitcher as he takes the ball back behind him, the hand is in this palm down position. Unfortunately, many players open their palms up to the sky on the service backswing, robbing themselves of the ability to properly throw the racket at the ball.
Non Racket Arm
While the non-racket arm plays a very important role in the forehand balance, it assumes an even more critical role in the serve. First, it must toss the ball in a smooth and long motion in order to ensure an accurate toss.
While the serve should be the easiest stroke to learn, poor tossing frequently leads to difficulties. Bad tosses are often the result of poor mechanics with the tossing arm. Good servers have a long and smooth movement of the tossing arm. From the starting service stance, the toss arm, which should be a little bent, first drops down to between hip and knee level. From that point, the arm then continually moves upwards, with the ball not being released until the tossing arm is above shoulder level.
After the ball is released the tossing arm continues to go upwards, fully extending towards the tossed ball. Unfortunately, many beginners and intermediates abort their toss. This is because they do not extend their tossing arm. This aborting of the tossing arm is the principal reason for poor tosses.
Pointing to the ball will help you extend your tossing arm and if you keep pointing the fingers at the ball as long as possible this will also keep your tossing arm in the extended position.
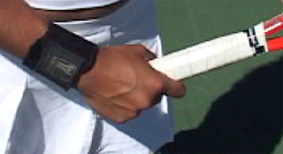
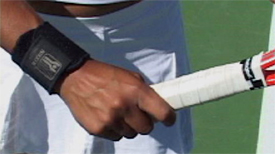
The fingers play another important role in a good toss. There are different theories regarding this, but I suggest holding the ball in the fingertips of the tossing hand. This will help you control the toss as you have excellent feel in the fingertips. Although many pros hold the ball further back toward the palm of the hand, I feel for the average player that this diminishes their tossing accuracy.
In addition to all of the tossing mechanics just discussed, another key factor is the angle of the tossing arm. Specifically, as the tossing arm moves up to toss the ball, the angle formed by the line of the arm and the baseline should be at about 45 degrees.
Having the arm at the 45 degree angle enables you to turn your hips and shoulders as you toss the ball. In contrast, if the tossing arm is at a 90 degree angle to the baseline (that is, if it points towards the net strap as you toss), you can not effectively turn. Also, keeping the tossing arm at the 45 degree angle throughout the tossing action will help the accuracy of the toss.
While you have to chase your opponent's good shots, there is absolutely no reason to chase your own service tosses! Remember, proper balance and a good toss are equal partners. Don't ruin that good partnership by hitting errant tosses. Rather, develop the discipline to not hit your poor tosses - just catch them and start over.
Additional Use of Opposite Arm
The job of the tossing arm is not done even after the tossing motion is completed. Even after the ball is released from the tossing hand, the tossing arm continues to extend upwards towards the tossed ball to ensure a proper toss (this is the "followthrough" of the tossing motion).
As the forward swing of the racket begins, the tossing arm then drops down to near the left pocket (the right pocket if you serve lefty) and stops there until the end of the swing. At the end of the swing the racket arm should cross over the tossing arm in a balanced position.
Placement of the Toss
Where should you toss the ball? For the beginner using the Semi-Western grip, the contact point to which you should toss to is slightly ahead of the front foot (the left foot for a right-handed server). If you draw a line straight from the contact point to the ground, the line would hit the ground just a few inches ahead of the toes of the front foot.
If you use the Eastern forehand grip, the toss is slightly farther back, closer to your body. The line from the contact point to the ground would go straight through the front toe. This allows you to hit the serve while using the proper balance components for a beginner. As a reminder, those components consist of (1) not moving either foot across the baseline and 2) the back adjustment foot rising, gently turning and slightly moving sideways, all to allow for the proper rotation of the hips and the weight transfer.
Tossing too far in front will put you off balance as you "chase" the ball. Do not (as a beginner) toss the ball any farther in front than a few inches. Imagine you are standing on the edge of a high-rise building as you toss the ball. If you toss the ball just slightly ahead of the front foot you can hit the serve while staying on balance. But if you toss the ball too far in front of your body and have to chase the ball to hit it, remember to call out "fauuuuuult" as you fall off the building and head a few dozen stories down toward the ground!
Interestingly, the ball position of the toss (at contact) when you use the continental grip is often misunderstood. In particular, there is a misconception as to how far forwards the ball is at contact in relation to the position of the head. At contact, the ball is generally no closer to the net than the head (or, at most, just slightly closer). It is almost impossible to properly strike the ball with the Continental grip if the ball is any more in front at contact.
You can see this in the picture of any top server at the moment of contact. The ball is no closer to the net than the head (or if the ball is closer, it is just slightly closer). So why do you hear coaches tell their advanced players to toss the ball "in front"? The explanation is this. Advanced servers will toss the ball out into the court (i.e., over the baseline and towards the net) and then launch into the court as they go up to strike the ball.
This jumping moves the player's head forward (i.e., towards the direction of the net) so that at contact the ball is either at the head position or, at most, just slightly in front of the head. In other words, the head "catches up" with the ball as a result of the jump. If you do not jump into the ball but, rather, keep your front foot on the ground and step forward over the baseline with the front foot, a similar phenomenon occurs but not as pronounced since the step does not bring you as far forward into the court as the jump.
One final note on the ball position and the toss. As discussed earlier, the tossing arm should be at a 45 degree angle to the baseline when it tosses the ball up. Because of this, the ball will arc somewhat from the time it leaves your hand to the point of contact. In other words, the ball, if you serve right-handed, will arc somewhat from right to left from the time it leaves the tossing hand to the point of contact.
Height of Toss
How high should you toss the ball? I recommend that you toss about six inches to a foot above where the tip of the racket is if you are fully stretched up (toes, arm and racket) to hit the serve. It is true that a number of the touring pros toss much higher. But tossing the ball that high makes it more difficult to properly time the swing, particularly on a windy day. These players also have tremendous knee bends and also great body rotation, all of which take more time than a simpler, basic motion. So at the start, the player should try to develop a toss that is high enough to allow him to execute his motion, but not any higher. As the development of the motion continues from the more basic to the more advanced, every player will adjust his tossing height to match the technique and the rhythm of his own serve.
Banking and Pronation
If you watch any top server as his or her racket moves up from the "drop" position below the shoulders to strike the ball (i.e., as the racket is "thrown" at the ball), two elements are always present: "banking" and "pronation."
"Banking" is the term I use to refer to the tilt of the shoulders. As the racket of a top server moves up from the "drop" position to strike the ball, the hitting shoulder (as the racket reaches for the ball) rises so that at contact the hitting shoulder is clearly higher than the shoulder of the tossing arm.
Interestingly, in advanced serves there is an earlier "opposite" banking which also occurs. Specifically, at the completion of the toss, the shoulder of the tossing arm is higher than the shoulder of the racket arm. A line formed by the points of the two shoulders will form an approximate 45 degree angle to the ground (some pros have a greater than 45 degree angle.) The "cartwheel" effect of going from this earlier banked position to the later opposite banked position is a source of power and spin on the serve.
The banking of the shoulders which occurs when the racket moves up from the "drop" position is coupled in all top servers with the pronation of the wrist and forearm. Pronation in serving means the rotation of the wrist and forearm as you "throw" the racket at the ball - some teaching pros analogize it to the action you use when you screw in a light bulb.
Much has been written about pronation. But players still have a difficult problem mastering the concept. If you look at the motions of top players, pronation is nothing more than rotating motion that drives the racket upward and through the ball. It naturally continues after the contact and well out into the followthrough. Unfortunately many players get caught up in the concept of 'wrist snap" and never develop proper pronation.
You can see pronation in the serves of all the top players, and in good service motion at all levels. The palm of the hand, the forearm, and the upper arm all rotate counter clockwise as the racket starts up to the ball, continuing through the contact. In an advanced player, the amount of this rotation can be 180 degrees or more.
Advanced Footwork
Some teaching pros advocate that advanced players should consciously think of jumping into their serves. Others contend that players should jump but merely as a by-product of the upward thrust of the knees and not intentionally. A third group believes that jumping reduces serving effectiveness and should be avoided. One thing is for certain: almost all of today's tour players are in the air at contact.
My view is that at an advanced level of tennis, jumping into the serve adds to the power of the serve. But it is something that happens as a result of the deeper knee bend that became possible with the change in the serving rules over 40 years ago.
This change has probably leveled the playing field somewhat on the pro tour. It allows more players to have powerful serves as it enables them to literally launch their bodies into their serves. In contrast, under the "old" foot fault rule (in effect until 1959) under which jumping was prohibited, it was more difficult to generate that kind of power. It took more skill and as a result fewer players were able to master a really big serve.
I do think that jumping can add power to the serve at advanced levels, but I do not believe jumping helps accuracy. In fact, it's probably the opposite. Remember that serving is like throwing a baseball. Try throwing a baseball while jumping compared to keeping your feet on the ground and you will instantly see that jumping is less accurate. I think this is one reason why there are more double faults in pro matches today than when the old foot fault rule was in effect.
This does not necessarily mean that overall serving effectiveness has decreased. Rather, it may be that there has been a trade off of accuracy for power. However, for some players, particularly those less gifted, the trade-off works the other way and these players would be better off not jumping. Thus, whether it is better to jump depends on the individual. If you can jump without sacrificing much accuracy, incorporate it into your serve. But remember that if you do not jump you can still have an excellent serve. The old foot fault rule prevented Kramer and Gonzalez from jumping into their serves but they still had among the greatest serves of all time.

